Chapter 03
Your first Dream
This chapter walks from an empty scene to a Dream you can watch in your world. It takes about ten minutes.
1. Put the player in the scene#
Choose Dreamer Pro > Add Dreamer Pro to Scene. The Dreamer Pro Player appears in your scene. It carries the video player, the player controls, and every panel a Dream can show. It is also your first Dream. You only ever need one player.
2. Open the editor#
Choose Dreamer Pro > Dream Editor. Your Dream is already there, with its tab at the top of the window and the timeline under it. To add a second Dream later, press the "+" at the end of the tab row.

The window is the timeline. Everything else lives in panels around it: the Properties panel on the right, the Scene Objects list on the left, the Content Drawer, and a footer with Lint and Preview.
A new Dream shows three tracks: Cue, FX and Move.
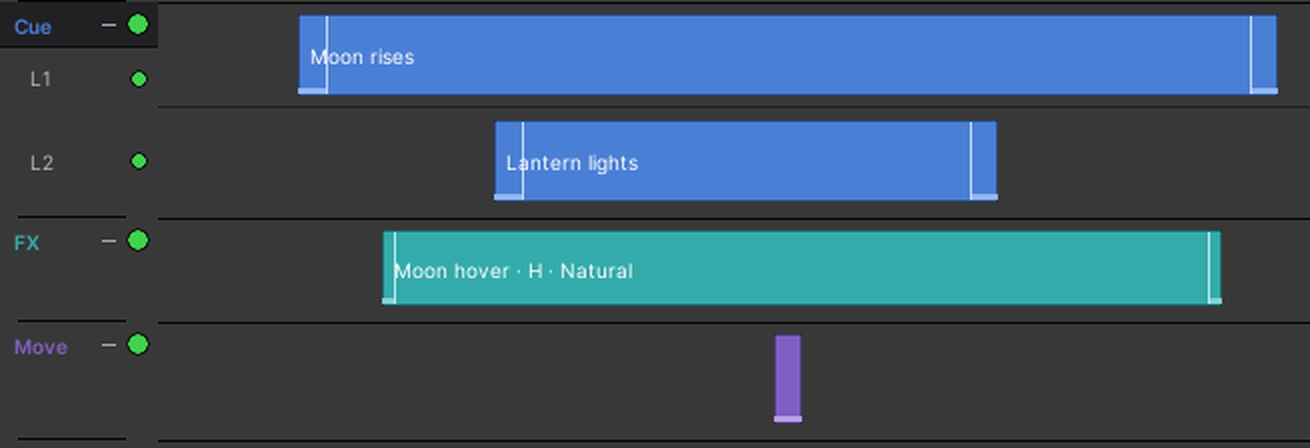
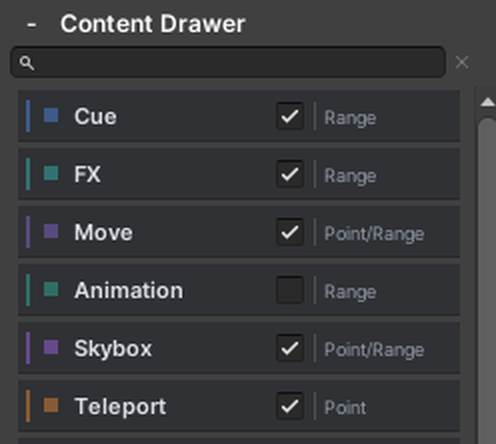
The others are there too, turned off. Turn one on with its checkbox in the Content Drawer, and it appears on the timeline.
3. Give it a video, or not#
A Dream can run in time with a video, or on its own clock. A new Dream starts on its own clock.
With a video: press the cog on the Timeline bar, then open Video. Under Playback choose Hosted. Paste the link into URL. Then press Fetch Timeline Audio, and Fetch Audio to confirm. Dreamer Pro fetches the sound of the video and draws its waveform under the ruler, so you can place things on a beat.

Without a video: leave Playback on Non-hosted.

Either way, the Dream lasts until the last thing on its timeline ends. Its length is set for you, from the timeline, and shown locked in the Video panel.
4. Put something on stage#
Pick an object in your scene that you want to appear during the Dream. Turn it off in the Inspector, so it starts hidden. The Dream will turn it on and off at the right times.
Right-click the Cue track at the time you want and choose "Add Cue at" that time. A node appears. In the Properties panel, set its Object: drag it in from the Scene Objects list, or pick it. Set when it starts and when it ends, and choose an In Effect and an Out Effect under Transition. Fly, Spin, Bounce, Scale and Shake are all there.
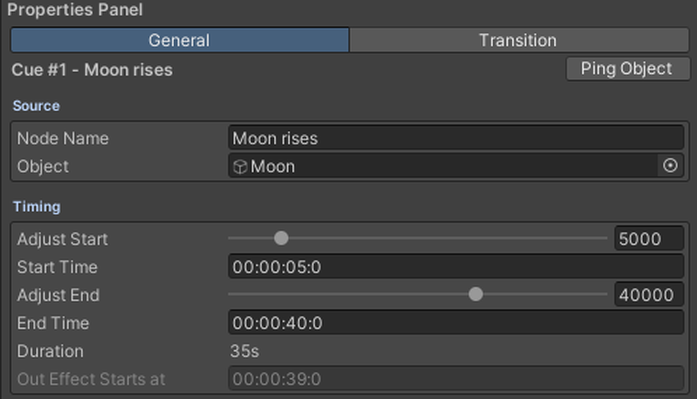
Drag the node's body to move it in time. Drag its right edge to make it longer.

5. Watch it in the editor#
Press Preview in the footer, then press Space. The editor plays the Dream in the Scene view, with your object flying in and out at its times. The buttons on the Timeline bar play it too, and jump to its start or its end. Drag the playhead on the ruler to scrub. Preview is for checking timing and placement. What a viewer sees in the world can differ in small ways, which chapter 4 explains.

6. Check it#
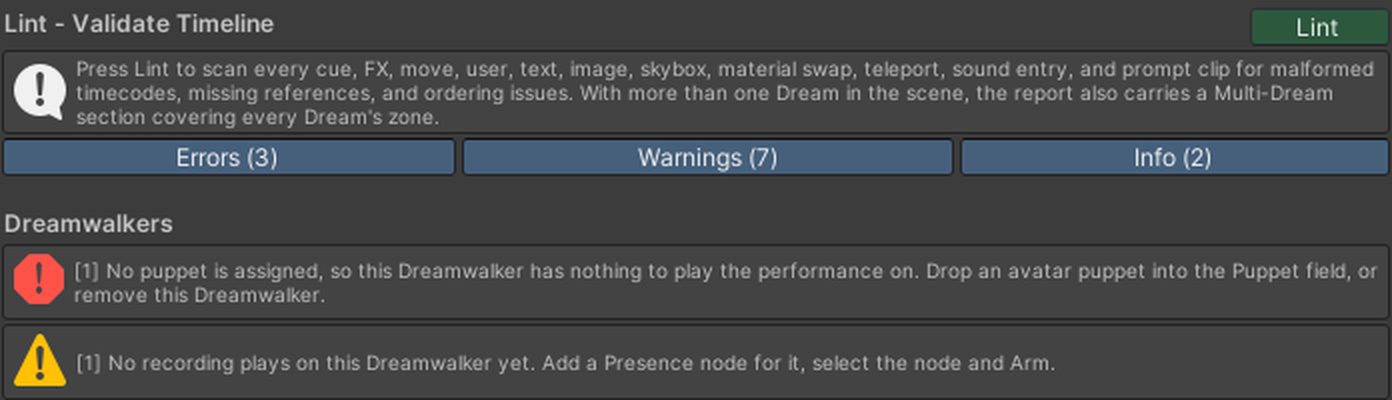
Press Lint in the footer. Lint lists anything that would not play: a cue with no object, a sound with no clip, two things fighting over the same object at the same time. Fix the errors. Warnings are advice.
7. Watch it in VRChat#
Build and test your world the normal VRChat way. When the world loads, the player controls appear in front of you. Press play. Your object flies in on time.
If the upload stops with a "Dreamer Readiness" message, it names what must be fixed first. Lint shows the same list.
What to try next#
Turn each track on in the Content Drawer as you need it.
- Add a Sound node and set its Audio Clip.
- Add a Text node to put a caption in front of each viewer.
- Add a Prompt node to ask a question, then make another node depend on the answer.
- Turn on Slideshow at the top of the Video panel to make scenes a presenter steps through.
- Add a Dreamwalker and record a performance for it.
Each of these has its own chapter.